Creamy Stuffed Baked Potato & Leek Soup

SOUP NUMBER TWO – Creamy Stuffed Baked Potato and Leek Soup. 

This soup was so very different from what I expected.  And as usual, I varied from the recipes that I read online. 
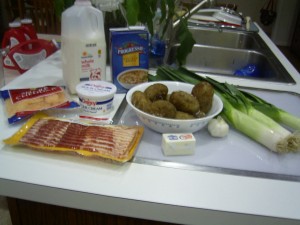
potato leek soup ingredients

6-8 small to medium baked potatoes
1 Tbs of butter
3 medium leeks
4 cloves of garlic
4 cups of chicken broth
kosher salt (it was already on my potato skins)
pepper to taste
6 slices of thick bacon (eventually diced)
2/3 cup sour cream
1/2 cup milk
1 cup cheese


I baked my potatoes earlier in the week.  I actually planned on trying this soup – and I especially wanted to see how different this recipe was from the creamy potato soup of the week before.

So I started my prep with making sure I had all my ingredients ready. I peeled and cubed the potatoes, I diced up about 1/3 of the potato skins (discarding the rest to the compost pile),  I washed and cleaned my leeks – and sliced them up.  I prepared my garlic slices and then got started.

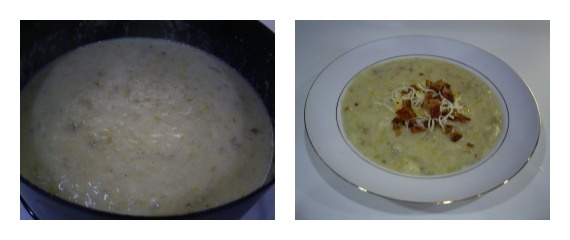
First, I put my 1tbs of butter into my pan, melted it and then added my 6 slices of thick bacon (doesn’t that look good middle picture below – smelled good too).

Once that was done, I took the bacon out onto a paper towel lined plate  and added in the garlic, onions to the bacon drippings ~  and re-washed leeks.  I used all three of the leeks that I purchased. They were organic and I had to wash – slice and then rewash,  but I used them all because the other recipes I had read said people couldn’t taste them in the soup and I definitely wanted the onion like flavor of the leeks in the soup. 

Add and cook your sliced leeks with the onions and garlic until the leeks are soft  – about 10 minutes, then add the chicken broth and cook for about 20 minutes longer to really get the leeks very tender.
Next you’ll add the potatoes and chopped skins – I simmered this for about 10 more minutes – while I thought of how I would “cream” my potatoes.  

I finally decided on two almost even batches in my kitchen aid mixer – as I could not find my blender (which is the usual way I would do this).  Once I got them to the consistency I wanted, I returned them to the pot.  You can chose your own consistency here — but the thickness does depend on the starch from the potatoes, so you will want to break some down to get the soup thickness you desire, as well as a creamy texture.

Stir the sour cream and milk together and then stir into pot with about 1/2 the cheese.  I didn’t have cheddar cheese that I could actually use (it turned out to be moldy), so I used  a 4 cheese blend.  I have read of people using all sorts of odds and ends of cheese in this soup and I don’t think it can hurt it.  My soup would have had a stronger cheese flavor with the cheddar, but it also might have lessened the flavor of the leeks.  You taste buds must be your guide when choosing.

I cooked mine down  (about 30-40 minutes on simmer, stirring regularly), and then stirring in the remainder of the cheese right before I served it.  I will say it retained the leek flavor and was definitely not as creamy as it could have been had I used the blender, or if I added cream cheese instead of the sour cream.  But it was good, hot and hearty and we definitely enjoyed it with the poppy seed homemade bread that I made earlier in the day.  I think though if I had to choose, I’d go with the easier and faster creamy potato next time.  Much less work and definitely richer tasting.

Don’t forget to garnish with those bacon bits — and extra cheese  ~ and if you like it ~  some sour cream!

cooking and ready to eat

Easy Creamy Potato Soup

I am going to be doing a series of soup recipes here on my blog.  You might ask why? — but I think there is nothing more satisfying that a hot cup of soup and some homemade bread on a cold fall or winter day.  There is no rhyme or reason the the way or sequence that I will use with these recipes and I hope you will try them and leave a comment on the blog as to whether it was a keeper or not in your house.

SOUP NUMBER ONE ~ Easy Creamy Potato Soup

This first soup was quick and easy and delicious.  I often make things based on what is on sale, or what I happen to have in the house.  I have learned over the years some bits and pieces of substitutions that work and so even though something may not “call for it” in a recipe – I am not afraid to try new things.

That said ~~  this soup was really easy to make, and delicious.  It was rich but not spicy at all.  We happen to like it that way… you may want to add additional seasonings to your if you like it spicier.
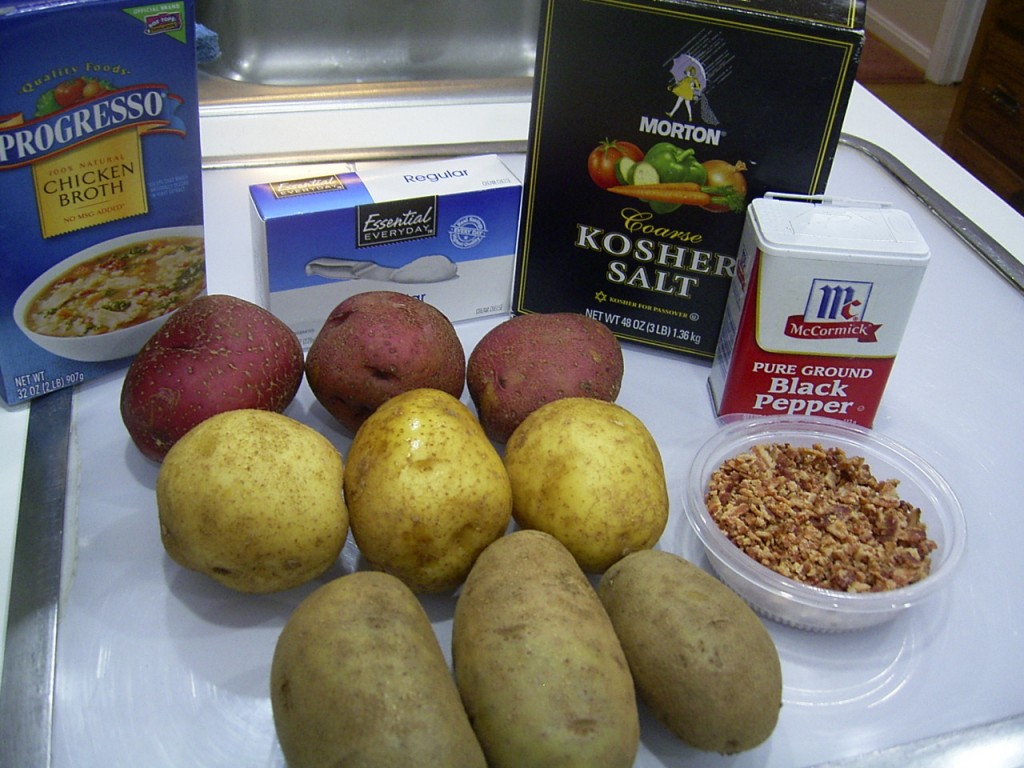
creamy potato soup ingredients

6 cups chicken broth

10 decent size potatoes (I used 3 different types – yukon gold, red and russet)
  ~ approx. 6 cups cubed

1 8oz package of cream cheese  (leave it out to warm to room temperature)

Salt and Pepper to taste

4 Slices of Bacon (cooked and crumbled for garnish)

Peel the potatoes and cut into approximately 1/2-1 inch cubes; approximately 6 cups.  I needed to add one more potato than pictured to get my 6 cups cubed.

Place the potatoes in your soup pot with 6 cups of chicken broth.  I used the 32 oz container pictured and another can to get to my 6 cups of broth.

Add salt/pepper to taste.

Cook until the potatoes are tender/done.

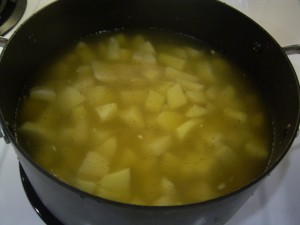
potatoes cooking The picture here is the potatoes in the chicken broth once they were cooked.  You will need to mash up some ~  to all of the potatoes in the pot till you get a consistency you like.  Just  take some out, mash them and add them back into the pot.  I did mine in batches.   The starch released from the mashing of the potatoes will thicken up the soup.

I actually took out some potatoes, mashed them, and then returned them directly back to the soup pot.  I did this till my soup was 90% creamy with just a small hint of some chunks of potatoes.

Note: You can take them in batches and but them in a blender, or you can use a handheld immersion blender and keep them in the pot.  In my case, I did them by hand a little at a time as I wanted to have some chunks of potatoes in my soup.

Once you are ready add the cream cheese.  You should cut the cream cheese in chunks if you didn’t leave it out to warm to room temperature (I put mine away after the picture) because it will take much longer to completely melt into the soup if it’s one large cold chunk!

Cook and stir, stir, stir. 
I had to stir for longer than I wanted because I didn’t leave the cream cheese to warm to room temperature …. I am hoping you remember and don’t have to quite stir that much.

Serve immediately (or simmer till ready, stirring regularly) and garnish with the cooked and crumbled bacon.  And yes, I forgot to take a picture of the finished soup in the dish, but I promise I’ll take them in the future.

Saturday Beef Stew

Today I started with one pound of beef cubes out of which I wanted to make a stew.  This beef stew was supposed to be “scaled” down somewhat for just the two of us.  However, we wound up with enough for second meal.  I feel good about that for two reasons, one is that I don’t have to cook tomorrow, and I used up a lot of things waiting to be used in my refrigerator.  I also didn’t use a recipe.  I looked into my closet (at spices and such) and into the refrigerator for what we had on hand, and away I went to create dinner.  I want to call this stew “whatever you have in your refrigerator to use up beef stew” but the name is just way too long.  Fridge Leftovers Beef Stew?  Use it Up Now Beef Stew… well, you get the idea.  This stew isn’t going to be hurt by a little less peppers and maybe some broccoli, or green beans etc.  If you have leftover cooked vegetables, add them to stew about 10 minutes before it’s done.  Stir them in, put the lid back on and they should heat up fine. 

And if you haven’t already guessed, we are again using the cast iron dutch oven on the stovetop.  I use this pot because it’s just plain easy, the dinner is cooked super fast and it cleans up easily. I just can’t see a downside right now.

stew ingredients

First, I cut all my ingredients (onions, peppers, garlic, celery) which I specifically chose simply by what I had in my refrigerator and wanted to use in this stew. However these are all things that are going to give that great flavor you want in your stew

Then, I mixed the flour, minced garlic, minced union, black pepper and thyme. 

I dissolved the bouillon cubes in the cup of water, as well as having the second cup of water and the other ingredients ready to go.

I sautéd the onions, garlic and celery in olive oil in the dutch oven, on the stove top. Once they are done, remove them from the pot and set them aside.  I turned up the heat on the pot, put in additional oil and waited till I thought it was hot enough to sear the meat.  I dredged the meat in the flour mixture (made earlier) and then put it into the hot pan. You have to watch this and stir as your goal is just to brown the meat.

stew ingredients

 Once your meat is browned, the rest comes very fast.  I put in the dissolved bouillon and water and stirred. The potatoes on top of the meat, then the cooked onions, peppers and celery, the red pepper flakes and the bay leaves.

remainder of the stew ingredients


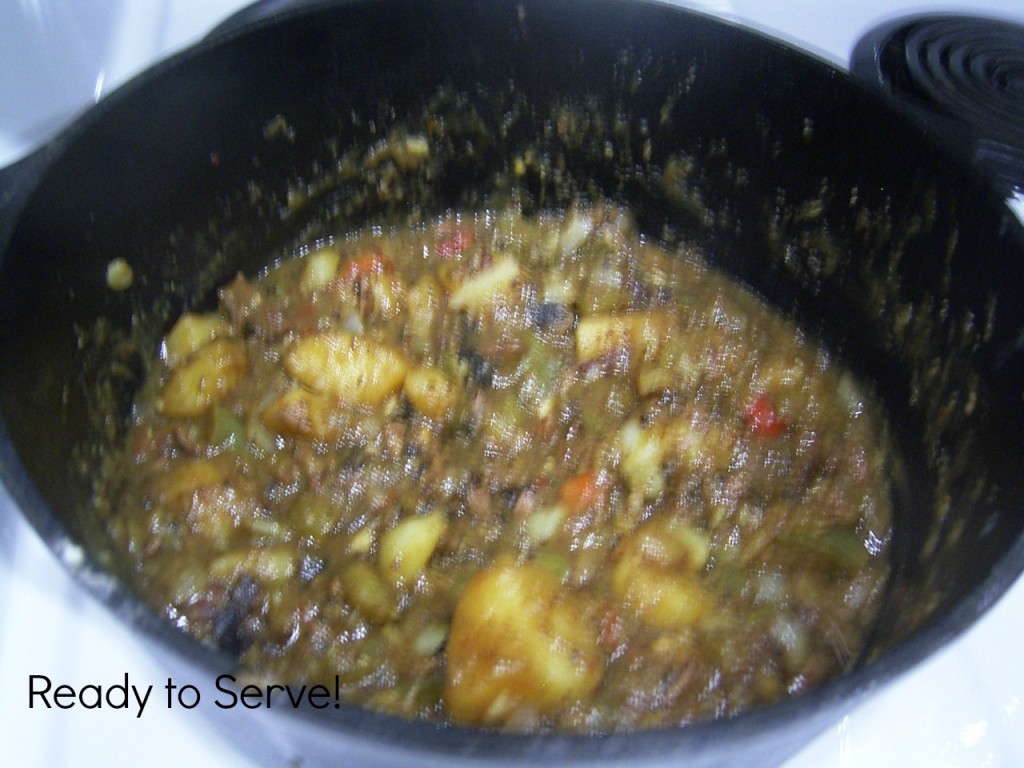
finished stewLastly I added the worcestershire sauce on top of it all and closed the lid and moved the heat down to low. 
You need to move the heat down to low!

I cooked mine for 45 minutes, took off the top and stirred the contents. 

It was perfectly done. Please remember to remove the bay leaves before you serve the stew!

It was a nice hearty, thick stew, and again it was delicious.   I served biscuits with this for a hearty Saturday meal. 

Homemade Artisan Rye Bread

Let me first say… I do bread.

The learning – for me – took a few twists and turns but eventually I learned how to deal with yeast.  In the beginning of my journey my loaves were just plain gorgeous, as were my yeast coffee cakes – however no one could eat them.  They weighted about 2 tons out of the oven and the only result back then that I could guarantee was that I would have another beautiful piece to varnish and use as a doorstop.  Oh, we laughed heartily back then about all those gorgeous “mistakes”  I made.   

I couldn’t seem to follow a recipe and get a result that we could actually eat.  Finally I was able to master the yeast – get to understand what it wanted from me to perform it’s best and what I needed (without fail) to do to insure it worked as it should. 

And then… I could say – I do bread.  And I still do bread and cinnamon rolls, and other items containing yeast without hesitation.  I started making bread because of my allergies.  It seems most commercial products contained some form of corn.  I am allergic to corn, and also fructose so that I cannot have anything containing either corn or fruit.  When I found this out and started reading the labels I knew that I needed to start making bread for my family all the time.  

Fast forward to today.  My favorite breads to make today are the Artisan breads. When making Artisan loaves – especially the Artisan Bread in 5 Minutes a Day from Jeff Hertzberg, MD and Zoe Francois or the No-Knead Breads from Jim Lahey and Sullivan Street Bakery – you discover just how easy and fun making your own fresh baked bread can be.

I really wanted to try the rye bread… so here is my first attempt at Artisan Rye Bread!

This recipe is from the Artisan Bread in 5 Minutes a Day Cookbook and is slightly adapted because I cannot use either the cornmeal for sprinkling nor the cornstarch for the cornstarch wash they recommend.  If you want their recipe and to know about those two items, you will have to check out their book for that information.

I am listing the names of the ingredients I used because I have found that sometimes, the actual brand will make a difference in the finished result.

3 Cups Lukewarm Water (I made my 100 degrees)
1 1/2 Tbsp Fleischmanns® yeast
1 1/2 Tbsp Morton® Kosher Salt
1 1/2 Tbsp caraway seeds (plus more if you want to sprinkle them of the outside)
1 Cup of Organic Whole Grain Rye Flour from Arrowhead Mills®
5 1/2 cups Gold Medal® All Purpose Flour

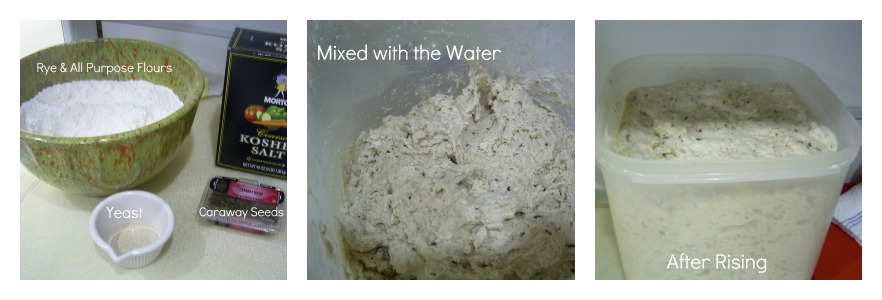
rye process for artisan bread

Mix the rye and all purpose flour and set aside.  Next mix the caraway seeds, the yeast, and the salt into the water in a large container.  Once mixed, add in the dry ingredients.  Do not knead.  Just add them in and stir them to combine them.  Once done, set aside covered with a towel and allow to rest at room temperature for about 2 hours. 

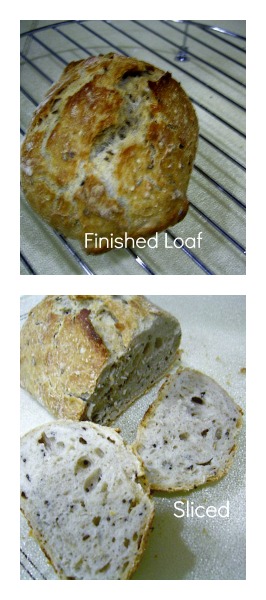
I actually went back to the dough exactly 2 hours later.  Dusted the surface of the dough in the storage bowl with flour, and my hands and parchment paper, grabbed about 1/4 of it and dusted it while making it into a ball and then oval to put onto the parchment to rise for about 40 minutes.Rye bread done and sliced

In the meantime, I preheated my dutch oven at 450 degrees.  I used this method instead of the pizza stone, and water method to get a crispy crust because I cannot do the cornstarch wash.  If I wanted caraway on the outside of my bread I would roll my bread dough in the seeds before putting it into the dutch oven.

Once it’s oven ready, I quickly open the dutch oven, throw in the bread – slash a few deep cuts into it and place back the lid.  I cook it for about 20 – 30 minutes and then remove the lid.  I cook it for an additional 10-15 minutes for that nice brown crust to form. 

Remove to cooking rack and wait till it cools before you cut it!  This recipe is a keeper for me. The bread is delicious and the preparation is easy and quick. I can’t wait to make the remainder of the loaves (the recipe can make about 4 – 1 lb loaves!)


Cooking Again – Spicy Pork Roast

Now that I am getting back to normal, and I have so much less on my plate to do for others (see Change is Inevitable), I have decided that I really need to start cooking again.  Lest you think that’s a joke, let me tell you, I have not cooked anything from scratch in a long time because of the heat, the power outages, or just plain exhaustion after working all day.

The heat and humidity around here has been unbearable most days – for the entire month of July.  That scenario drains all the energy from my old body and it makes me totally unmotivated to do anything.  And although I made sure I completed all the things I had to each day, anything and everything that could be – was put on hold.  And, I didn’t cook. 

Yesterday, I decided I needed to start cooking again.  I had a pork roast thawed, so I decided to make a medium hot and spicy pork roast.  This is out of my normal comfort zone.  I could have made something I had made 100 times before with 100% success, but there was no fun in that.  I also decided I did not want to use the oven – and considered the crock pot, but decided on the dutch oven on the stove top, which was also a first for me!

First I gathered information on the internet on which spices I needed to use, and how to combine them.  I did this by reading recipes for spicy pork roasts.  I didn’t see any that involved all the ingredients below, but many contained some of them and they gave me the inspiration to “try” what I thought would work. My main influence was from a Filipino recipe I saw and the resulting “praises” from the people who had tried that recipe. 

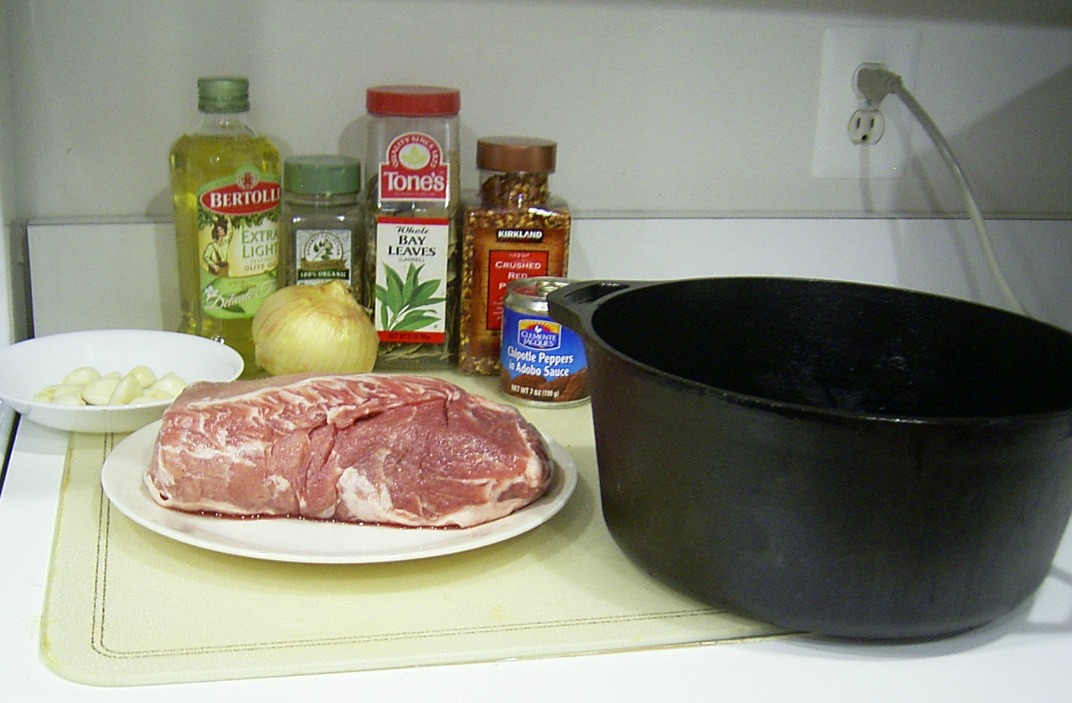
The picture is the ingredients I originally assembled, but as you can see I added more. Ingredients for Spicy Pork Roast

 3.5 – 4 lb. Boneless Pork Roast
4 – Yukon Gold Potatoes peeled and cubed (large cubes)
2 Tablespoons Oregano
3 Bay Leaves
1 Medium Garlic bulb – peeled and separated
Olive Oil – as needed
1 Medium Sweet Onion- sliced and chopped
½ Teaspoon of Crushed Red Pepper
1 small can of Chipotle Peppers in Adobe Sauce
¼ Cup of Kikkoman Soy Sauce
2 Tablespoons of White Vinegar
½ Cup of Water
Cup of Sugar

The first step for me was to make that spicy hot sauce.  I used my Cuisinart Chopper/Grinder and added the entire can of chipotle peppers, the 2 tablespoons oregano, all but 2 of the larger cloves of garlic, ¼ of the onion, ½ cup of water, ¼ cup of soy sauce, ½ tsp. of the crushed red pepper, ⅓ cup of sugar and 2 tablespoons of white vinegar.  I ground/chopped/combined it and then put it into a bowl and set it aside.

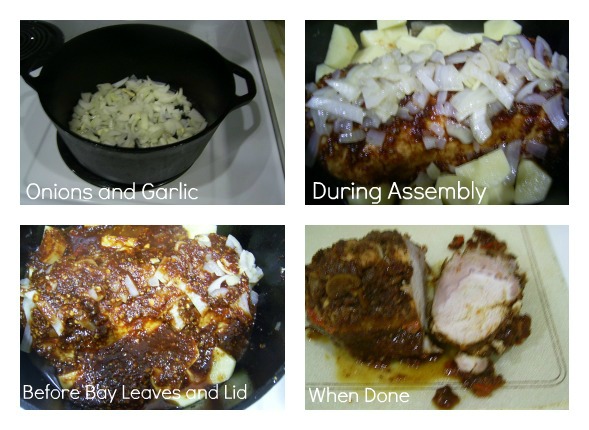
Next I put a little olive oil in my dutch oven over medium heat on the stove top and added the remaining garlic (which I had sliced thin) and all of the remaining onions.  I cooked them till the smell was amazing and the onions were just getting transparent.  It didn’t take long.  I put them in another bowl on my counter and proceeded to brown the pork roast on all 4 sides. 

Once the pork roast was browned,  I put ½ of the sauce I had made over the top, making sure to “paint” the roast with it.  I put the potatoes in on both sides of the roast, added the onion and garlic to the top of the roast, and put the remainder of the sauce on top.  Last I added the 3 bay leaves, and put the top on to start it cooking.

Spicy Pork Roast Pictures
Just 1 hour later on low – it was done.  I immediately removed and discarded the bay leaves. I think if I make this again, and you can bet my family is already hoping for that – I’ll try checking it a little earlier because the internal temperature of the pork was a little higher when I checked it than I needed.  It was still delicious.  My son gave me the ultimate compliment when he said it was spicy and sweet when you ate it and then gave you a punch of heat. He said I should make this my “signature” hot sauce.  That sure makes me want to try it with some chicken or shrimp!