Right now, we have only one family trip planned in our “new” RV. We have taken 2 trips in it, neither did I document. The first was because we went to go ATV riding and well, it snowed while we were there and it was so bitter cold, we decided the little ones (also called grandchildren) were not going to be able to be outside for long — and an “indoor” RV trip was most likely not going to work. The second was to Hershey Park in Pennsylvania where we stayed in the Hershey campground and had a wonderful time — till we were hit while parked, maybe more about that later.
When we purchased this one about year ago – it needed some repair.
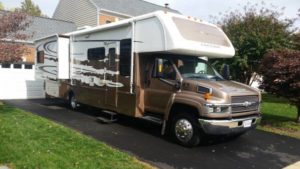
We didn’t see the extent of it right away, but knew by the price that there could to be issues. And here I just want to say, I know people just want to “get rid” of some of these RV’s after they’ve used them, and are hoping to stick someone with issues they can’t deal with — but wouldn’t it be better to say, their might be issues (or tell them exactly what the issues are) and price it accordingly, instead of saying “never had one problem in all the years I owned it”, or “it was stored inside”…leaving off the “because it leaks.”
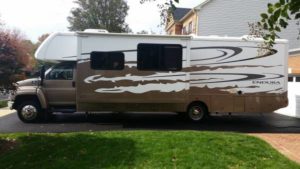
This model of RV has a “history” of being one that might leak. We knew that because we did our research before we looked at them. This one was leaking both in the front of the truck, and the back. Consequently, all the insulation in the front was “rotting” as well as the wood. The back was wet and upon more investigation, there were “wet” and rotting portions in the floors (especially around the bathroom).
It took some time to figure out what we wanted to do, and to fix the issues. The easy part was ripping out all the old that would or could be removed first before getting into flooring. The front over the drivers area was cabinets and a huge TV. We took all of that out to get under and behind to the insulation that was rotting.
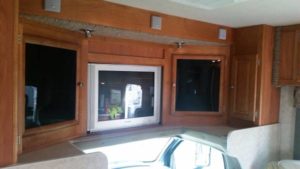
Eventually we removed and kept out most of the front cabinets, resealed the unit and installed new insulation. We added a bed floor which we fully carpet lined ~~ up and around the entire inside and got a custom mattress to fit the space. We put cabinets back on both sides and installed a flat screen TV up in one corner so that everyone including those in the bunk could see it. And then put in a tubular dog guard which expands in and out to keep the little ones from falling out. This is the before picture. We made the gate just tall enough to keep them in, where they still have plenty of room to climb over it, and secured it so that it stays permanently. The space is now large enough for 2 kids to sleep, but they can can sit and play up there as well. **I need to go the RV to take the ‘after’ picture which I will show you in a future post.
Then we tackled the replacement of wood in and around the back bed area, and the bathroom — once that was done, we leveled and re-did the floors.
We added new mattresses, toppers, microwave tray, and really cute hanging cubbies for our clothes in the huge closet. These cubbies hold enough clothes for all of us (5-6) for a week. There is even space behind them and we still have the other 2 closets in the bedroom (last time we used one for cases of water and jackets and the other was empty! Once we checked all the other systems ~ we were ready to hit the road.